I used to be the person that never put effort into my nails. If I found a color I liked, I’d stick with it for weeks. I’d let it chip, or I’d pick it off myself. I never tried to grow out my nails, because they would break anway. Whenever I did paint them, I would do it in five minutes before bed, wake up with those bed-sheet-prints all over them and not bother to fix it.
It now takes me an extensive amount of time just selecting my color, which I end up switching out within a few days. Doing my nails is part of my self-care routine. Although I never considered nails to be part of the beauty industry, I see now that they are. I don’t feel like myself unless my nails are properly cared for and sporting a seasonal-themed color. After months of practicing and experimenting during the COVID quarantine, I’ve picked up a few tips and tricks that have transformed my nails from dull to damn! It’s time I shared these tricks so you know it’s possible to make your next DIY mani look as professional as possible.
My Big Fixes
File and Shape
This may seem like the most basic step, but it’s one that I always skipped. I never saw the value of shaping my nails until I started and realized how much it helped with preventing breakage. Not to mention, manicures look WAY better when your nails have a consistent shape and length.
Push Back Your Cuticles
Another somewhat obvious tip that I never considered an important step in my nail routine was pushing my cuticles back. I would either forget, or just not care. I wish I could slap my past self. It’s so simple and makes all the difference in providing a cleaner, smoother polish application.
Invest in a Good Base and Top Coat
I understand nail polish can be overpriced for just one bottle and it’s hard to convince yourself to buy base and top coats to go with it, but it’s so necessary. If your nails are anything like mine — sensitive and prone to breakage — then a base coat is going to be your lifesaver. It smoothes out the rough surface of your nails so the color you apply on top can go on smooth and won’t stick to those ridges. I recommend Sally Hansen’s Hard as Nails Hardener or Zoya’s Naked Manicure Naked Base.
Top coats make all the difference in ensuring longer wearability and extra shine. They also smooth over any mistakes you may have made in applying the color. If you’re looking for a shiny top coat, I recommend Sally Hansen’s Insta-Dri Top Coat or Zoya’s Naked Manicure Glossy Seal. Matte top coats are a great alternative to mix things up.
Never, Ever, EVER Rush your Manicure
I was the queen of five- minute nails before bed and also the queen of rocking smudges and dents all over my nails in the morning. Don’t be like the old me. Please. You wouldn’t rush your professional manicurist in the salon, so why rush yourself at home? I suggest making a fun routine out of it. Light your favorite candle, put on a rom-com and take your time with your nails. You’ll thank me later.
Make your Layers Thin
I understand how tempting it is to cover the brush in a thick clump of polish and be done in one coat, but this is just asking for a goopy mess. Start with a thin coat, focusing on your application. Don’t worry if it looks streaky. Wait two minutes, then apply a second thin coat. By the second coat, any streakiness should be hidden and the polish should be fully opaque. If a third coat is needed, wait another two minutes and do a thin coat. If you do this correctly, you’ll have a clean manicure with less clean up afterward.
I think doing thick coats was my biggest mistake before. I would often do two thick coats and it would lead to faster peeling and more of a mess. Thinner coats will make the color last longer and look better from the start.
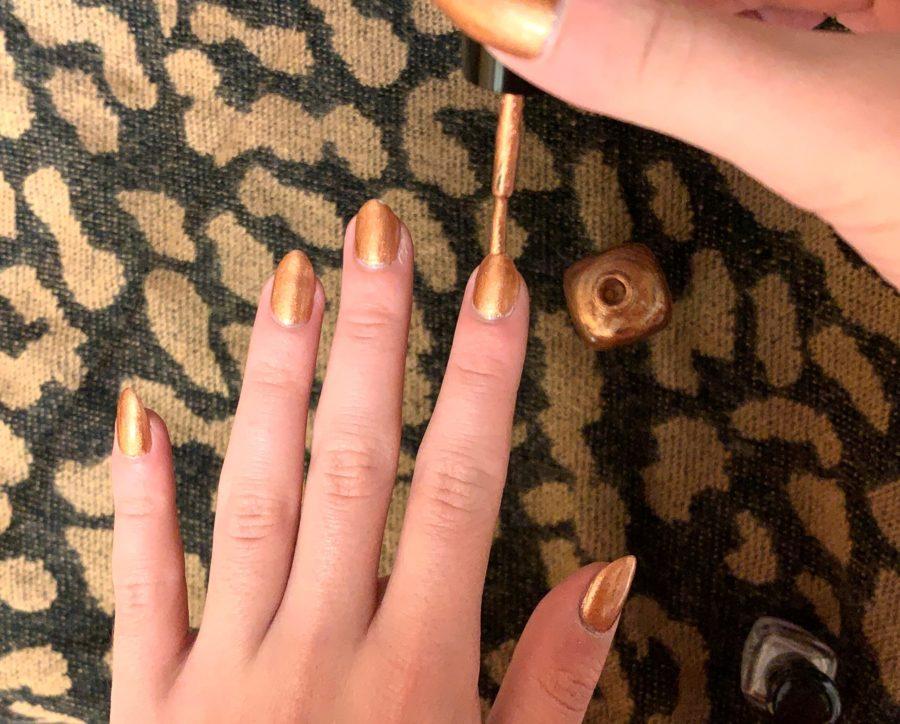
When Your Tips Start to Chip

Here there is noticeable tip wear in my polish, so I’m applying a small amount (Zoya Soleil) to the tips. I followed up with the Zoya Naked Manicure Glossy Seal.
My Nails One year Ago vs. Now
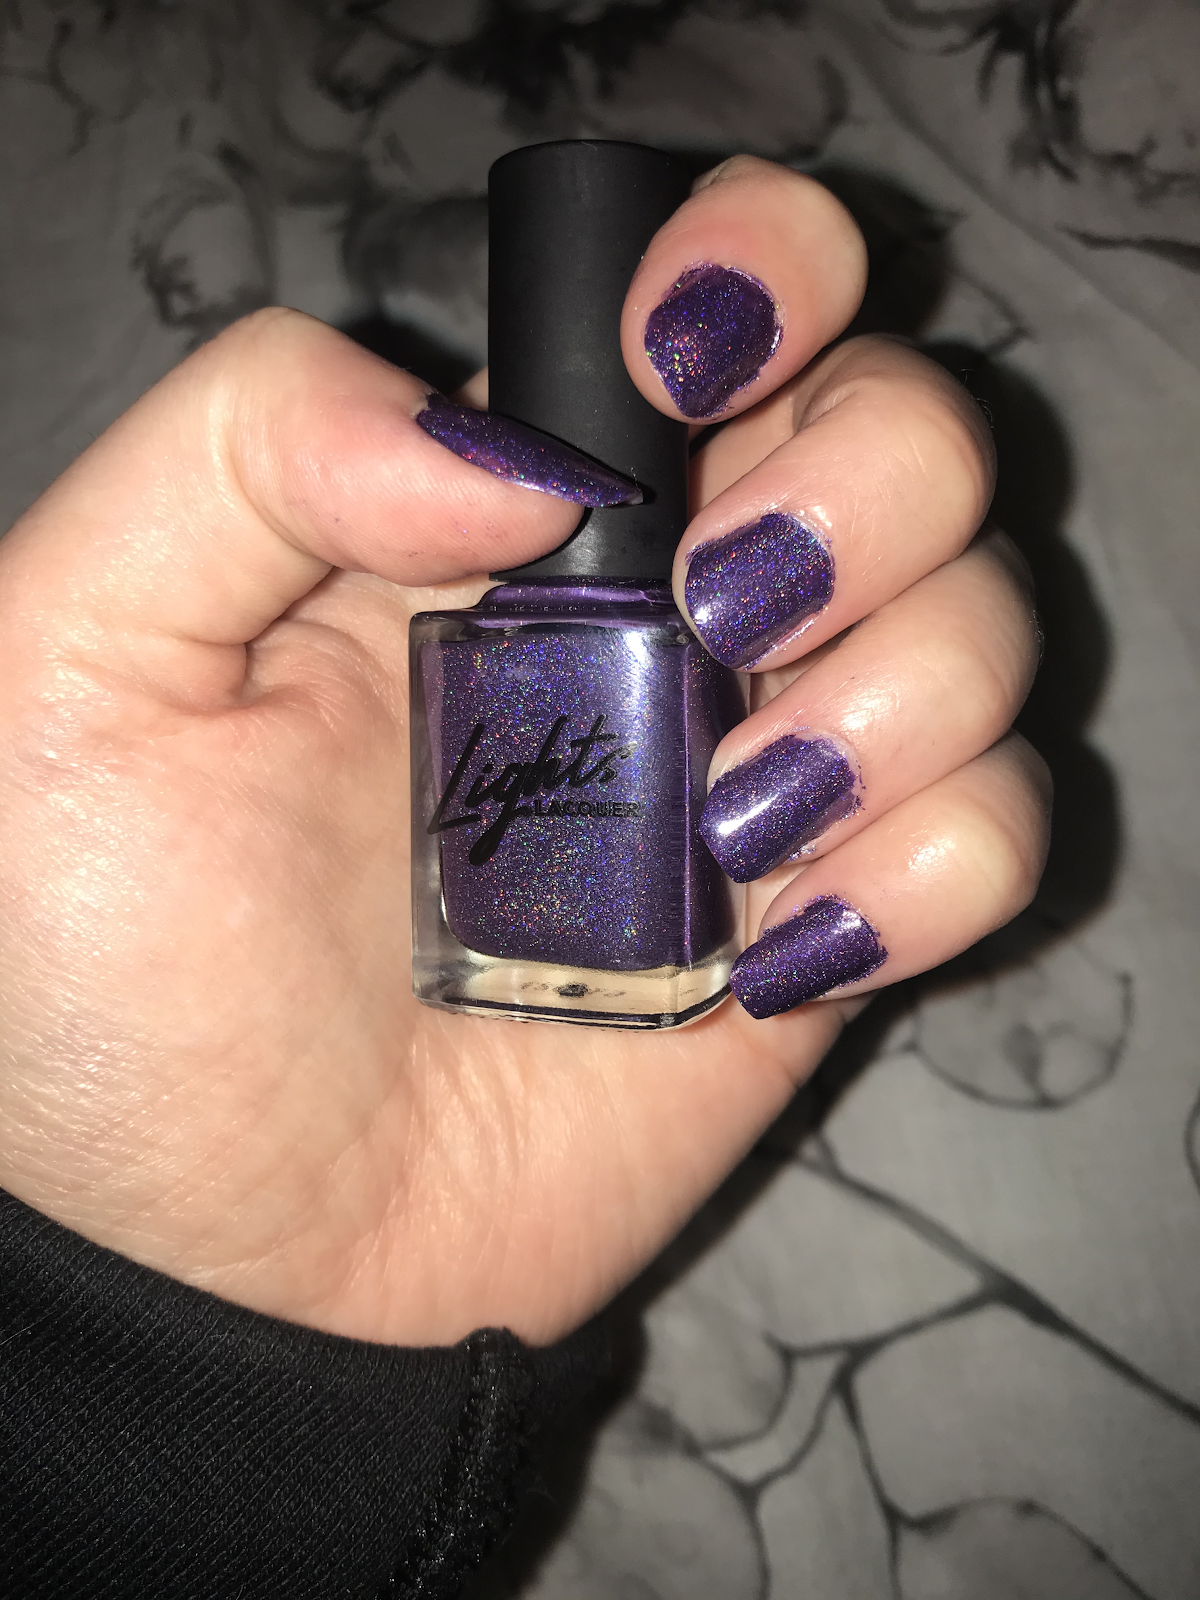
Lights Lacquer Amethyst Patrice Zoya Nail Polish
In the first picture, my nails aren’t filed or shaped consistently, my cuticles weren’t pushed back and overall the application is just messy. Since I’ve made those “big fixes,” I can say I’ve upped my nail game within the past year.
Take Your Manicure to the Next Level: This is How We Get REAL Extra
Recently, I started using the Gelie-cure system by Zoya Naked Manicure as a foundation under my polish. With just a few simple steps, my nails look 10x more lush and professional and people assume I’m wearing acrylics. The best part is I can do it all from my dorm. I use this foundation as a replacement for a normal base coat, then follow with my Zoya polish color and top coat.

Step One:
Apply a small amount of the Rescue Serum to all of your nails and rub to dry.
Step Two:
Apply the Repair Base directly over the Rescue Serum, avoiding cuticles and side edges.
Step Three:
Apply Gelie-Cure and clean up edges with an orangewood stick (this comes with every kit). Cure the gelie under the LED light for one minute.
Step Four:
Remove any remaining residue with the Clear Shine Spray.
After you’ve applied the Gelie-Cure foundation, follow with your polish color and top coat and ta-da! You have a professional manicure from home.
The Gelie-Cure system, when used as a foundation for your polish, is supposed to nourish, protect and promote the growth of your nails while giving it a smooth base for your color application. It’s perfect for impatient, indecisive people like me, because you can still change out the color of your nails up to two times without removing the Gelie-Cure base.
If you’re interested in the process and seeing what else you can do with Gelie-Cure, you can check out Zoya’s website with all of their Gelie-Cure tutorials. It might take some getting used to if you aren’t familiar with LED lights or using gel-like products, but it only took me one trial run to get the hang of it. It really is a simple process for such lasting results.
We teamed up with our friends at Zoya Nail Polish to give you everything you need for a professional at-home mani. When you purchase a full or travel size Gelie-Cure Kit and use code KENTNAILEDIT, you’ll receive Zoya’s Luscious collection sampler A and sampler B (the entire collection) for free. It’s time we start taking our at-home manicures seriously.
Code KENTNAILEDIT valid through Oct. 15, 2020.